Botanical Gardens Falls Artistic Version

Grdn7272E1B-1-Pub

To explore what it would mean to live fully, sensually alive and passionately on purpose, I have to drop my preconceived ideas of who and what I am. – Dawna Markova

This quote of Dawna Markova reminds me that creativity requires giving up our usual and comfortable way of doing things. Erich Fromm similarly stated “Creativity requires the courage to let go of certainties.” Charles Dickens, in the same vein, said “The important thing is this: to be ready at any moment to sacrifice what you are for what you could become”.

I am a person who, after developing a certain level of competence or “success”, enjoys practicing continually, developing habits that allow me to become “lost” in the creative process. This does produce a gradual sophistication of my output. However I lose sight of the fact that quantum leaps in creativity, and the enjoyment thereof, are the product of learning and melding new capabilities. It is because the transition period often produces “unsuccessful” results that I naturally resist change. These quotes remind me of the shortsighted nature and long term constriction of this, more comfortable approach.

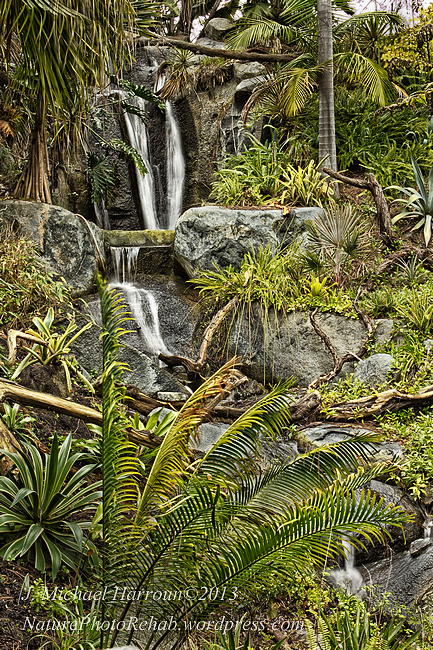
The remainder of this post refers to the photo at the top of this post. It is a highly processed image of a water fall in San Diego Botanical Gardens (previously Quail Botanical Gardens) located in Encinitas California about 15 miles north of the city of San Diego. I highly recommend it to anyone interested in nature or photography. It is roughly 50 feet (four stories) high. IMG-7272origi-Pub
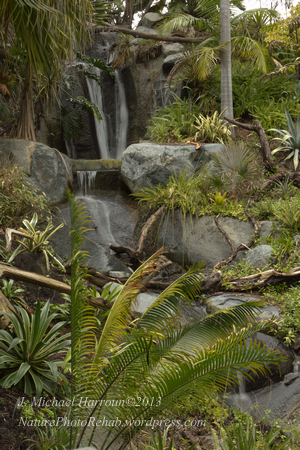
This is the original, unprocessed image. Many people will like it better than my processed version. I respect that.

Processing:My intents were first to exaggerate detail and secondly to make the water more apparent by increasing its brightness.  First, minor processing was done in Adobe’s Camera Raw (added a little “clarity” and “vibrance”, reduced noise and slightly sharpened (pre-sharpening which is not destructive as is output sharpening). Then Nik Color Efex Pro 4 was used to considerably increase contrast and detail (“detail enhancer” filter). Photoshop Elements was then used to dodge (increase the brightness of) the water and burn (darken) some of the bright rocks and the sky in order to direct the eye more toward the water. Finally Nik Sharperner Pro 3 provided output sharpening for display (This is the destructive type of sharpening that should be done as the very past step of the processing).

Now, at the top of this post, it appears as I wish it would have looked to my eye at the time. I will  reprocess this image several more times in different ways/styles for comparison (and maybe be a little creativity).

I am available to assist photographers who are just beginning their experience with photo processing.

J. Michael Harroun©2013 NaturePhotoRehab.com
Sunset Like a Window Upon Fire

P7098-0ed1C-DSz2

What a person actually needs is not a tensionless state, but rather the striving and struggling for some worthy goal. What he needs is not the discharge of all tension, but the call of a potential life-meaning waiting to be fulfilled.  Paraphrased from Victor Frankl

I find these words of Victor Frankl to be profound and inspiring. It reminds me that a complete lack of stress or tension does not help a person to grow or to develop their potential.  The goal, he explained, was for each individual to find their ideal level of stress or tension, the amount that stimulates growth of their abilities and provides meaning and purpose to their lives without being overwhelming.

Frankl was an Austrian neurologist and psychiatrist who was a survivor of German concentration camps during World War II. While in a concentration camp, he made many observations regarding human resilience and determination of spirit.  In his subsequent book, Man’s Search for Meaning, one of his conclusions is that people thrive on a certain level of stress, which varies from person to person. Less stress than this causes them to feel bored, lethargic or hopeless; while excessive stress causes people to be incapacitated mentally, emotionally and physically.

The remainder of this post focuses on the sunset photo at the stop of this post, which occurred several months ago near San Diego, California. Yes, it really did look like that. I have never before seen a sunset like this, with so much color concentrated in such a localized area. This photo received very little processing. (Specifically, Adobe Camera Raw was used to reduce noise, mildly increase “clarity” and slightly pre-sharpen). Almost all of the processing was to synchronize the position of the waves, as this is a two frame panorama. (During the time that the camera is swiveled to take the second frame, the waves move closer to the shore.) For this wave adjustment, Photoshop Elements was used to clone stamp, copy & paste waves. Finally Nik Sharpener Pro 3 was used to apply a little sharpening for display/web output.

I welcome comments and suggestions/criticisms.

I am available to assist photographers just beginning their experience with photo processing.

J. Michael Harroun©2013

Sun Seems Determined to Shine

P6956-8DbDkPre2BrtPub

Most of the important things in the world have been accomplished by people who have kept on trying when there seemed to be no hope at all. – Dale Carnegie

The image above was taken one year ago near San Diego, California. It causes me to think of persistence, hope and determination; of hanging on and striving to achieve a goal in spite of forces that would block one’s advancement.

The remainder of this post discusses photo processing. Primarily I wish to demonstrate, to photographers who do not yet process their images, that such processing can produce dramatic improvements. In fact, for RAW format digital images, processing is a requirement to achieve a quality final image. I am specifically addressing RAW format images here. Jpg images, which are processed within the camera, usually look much better than RAW images when initially downloaded. However, jpgs record much less image information than RAW files. Because of this, jpg file/format images have little tolerance for post-processing, if a person wants to make changes later. You can think of RAW file images as the negatives used in film photography and manipulated in the darkroom. They allow many different interpretations and adaptations, depending on the mood/goal of the photographer. This is why almost all professional photographers shoot using the RAW file format.

6956original1

This is the original, unprocessed middle image of  the set of three images used to make this panorama. I include it to demonstrate how much difference was made by the processing.

Using Color Efex Pro 4, the “dark contrast” filter was applied twice globally. Then the “brilliance and warmth” filter was applied centrally to the sun rays and a mild vignette effect was added only at the sides. (All of these changes can be done with Photoshop Elements alone. Color Efex Pro 4 just makes it much quicker and more convenient.) The most difficult and time consuming part of the processing was getting the waves aligned in the three different parts of the panorama  (In the time that it takes to swivel the tripod head for the next frame of the panorama, the waves move closer to the beach). Using Photoshop Elements, the waves were properly aligned with a combination of copying and pasting and by cloning waves in the following modes: hue, lighten, darken, and normal. (The clone stamp tool has options for many different modes besides “normal”; such as hue, saturation, color burn and doge, overlay, soft light, lighten, and darken, multiple and others.) Nik Sharper Pro 3 for display output was used except for the water which became distracting.

Now the image (shown at the top of this post) looks like a remember it. There is so much improvement between the original, unprocessed RAW images and the final image (at the beginning of this post), that it is fair to say that the processing rescued it from being deleted from the catalog.

I welcome comments and criticisms.

I am available to help people to transform their nature images from boring to impressive. My personal web site is NaturePhotoRehab.com, although it is easiest to reach me via this blog.

J. Michael Harroun©2013

Sunset of Golden Rays over the Pacific Ocean

6898E3FltPub

Life shrinks or expands in proportion to one’s courage.  – Anais Nin

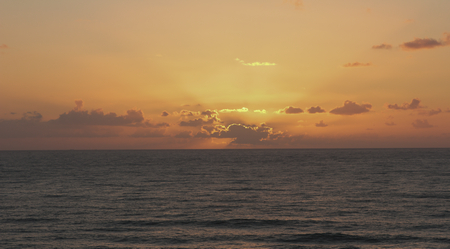
This sunset image was taken several months ago near San Diego.It is the result of quite a bit of processing, as the original appeared dull and flat. It was an example of digital images (RAW files) being inherently low contrast, appearing soft (unsharp) and flat with a limited perceived depth. (In spite of this, RAW files are generally the most desirable format because they contain so much image information that a plethora of post-processing functions can be performed on them with excellent results.)

(Jpg images are different. They are processed and sharpened within the camera at the time the photo is taken. The degree of sharpening depends on the setting that you have chosen for sharpness in the shooting menu. This is an advantage if a person sure that they will never want to enhance or further process their (jpg) images. Otherwise, RAW file capacity is an advantage. (As EvaUhu of lightshadowcolor.wordpress.com commented below, the best file format to shoot depends on the intended use for the image.)

Sharpening is a form of increasing contrast. Specifically, it is a very localized increase of contrast between adjacent dark light pixels (such as at edges). Some other modes to increase contrast, besides the actual “contrast” sliders, are: pre-sharpening, levels, curves, dodging, burning, white point, black point, gamma setting, tonal contrast, detail enhancer, detail extractor, structure and output sharpening. This is only a partial list. The fact that there are so many different ways to adjust the contrast of digital images reflects the degree that raw files suffer from poor contrast.

When I took this photo, the in-camera histogram indicated correct exposure for both highlights and shadows. However, when the RAW file was downloaded, the appearance was flat, dull and somewhat underexposed. Here is that original image, cropped but otherwise totally unprocessed.

6898 origlDSz2

(My thanks to Kyle Kuns of of hikingangelesforest.wordpress.com and to Heather of rapidcityrecess.wordpress.com for recommending that I include this original image)

To create the image at the very beginning of this post, contrast was added in six different ways. These were: first in Adobe Camera Raw for brightness and (1) pre-sharpening; then with Color Efex Pro4 adjustments for (2) curves, (3) tonal contrast and (4) darkening the side edges and finally with Nik Sharpener Pro 3 (5) adaptive sharpening for display output. Each of the first 4 steps (except for the pre-sharpening which was purposely kept very weak to avoid halo artifacts) improved the appearance, but not enough. The final image, however, looks pretty good to me.

My point is to explain that digital images, shot as RAW files, require processing in order to look their best. Even the best shooting technique does not overcome this limitation.

I welcome comments and suggestions (criticisms).

J. Michael Harroun©2013

Winter Ocean Sunset Panorama

P3752-4v2E2Pub1

Success means doing the best we can with what we have. Success is the doing, not the getting; is the trying, not the triumph. Success is a personal standard, reaching for the highest that is in us, becoming all that we can be.  – Zig Ziglar

This photo was taken several months ago in Del Mar, California. There had been a rain storm earlier that day. I expected that residual cloud cover would obscure the sunset. However, because some of the most dramatic sunsets occur when the weather is changing, I drove 15 miles from my home to this beach. I usually do this only when my energy and mood will allow me to enjoy walking on the beach and absorbing the feelings from the ocean, even if no sunset is visible. That way, regardless of whether the sunset is visible, I do not feel that my time has been wasted.

Technique: I set up, as is my usual technique, with tripod and shutter release cable, preparing for shooting a panorama if I was presented with a sunset  involving a large area of sky . I was rewarded with just such an opportunity.  This photo was taken about 20 minutes after the actual setting of the sun, when the cloud formations will often change quickly,  and when pink color often developes.  This is a three frame panorama with the camera in a vertical position.

Processing: Although I had exposed correctly using the histogram, the original images were flat and dull, showing very little contrast (as is common with unprocessed digital images). To remedy this, Adobe Camera Raw was used to increase brightness, contrast and (slightly) sharpness; and to decrease noise. Still the image looked lackluster. So Nik Color Efx Pro 4 (I strongly recommend this program to bring life and depth to images) was used for tonal contrast adjustment, which created the depth and drama that I had remembered. I did not  just color or saturation. Photoshop Elements clone tool was used to ease the abrupt transitions of the waves from frame to frame. (These artifacts are inevitable when wave movement is present, as the waves change position sightly while the tripod head is being rotated in preparation for the next frame of the panorama.) Then sharpening for display was done with Nik Sharpener Pro (another program that I strongly recommend). The final image accurately reflects what I was seeing and feeling at the time of the actual sunset.

I welcome comments and, even better, criticisms (as they will improve my skills).

J. Michael Harroun©2013 All rights reserved.

Wave of Stone HDR

D6576StonFs1Ef3WmPub

When I dare to be powerful, to use my strength in the service of my vision, then it becomes less and less important whether I am afraid.  – Audre Lorde

I find this quote profound and inspirational. My own experience has taught me the truth of this, but I tend to forget it anyway.

The remainder of this post does not relate directly to this quote. Instead, this post is about the photo processing technique called High Dynamic Range (HDR) processing. In many scenes, there is too much difference between the brightest and darkest portions of a photo for both to be exposed properly within a single image. To overcome this, more than one image is taken of a scene/subject, identical to each other except for the exposures (usually three to five images are taken each one to two stops of exposure different from each other). One image is well exposed for the highlights and one is well exposed for the dark shadows. Other frames are exposed between these. Then, through computer processing, the correctly exposed portions of each photo can be combined into a single image that has everything well exposed. (Although there are several good HDR processing programs, I use Photomatix Pro)

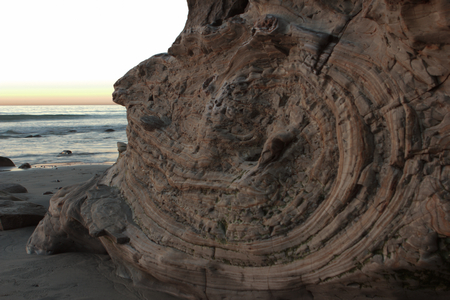
The photo at the top of this post is of a portion of sedimentary rock that I happened to notice while waiting at the beach for the sun to set. I came back to photograph it 25 minutes after the sunset. The rock was in deep shadow; but the sky was too bright to have good exposure in a single frame. That was a perfect situation for HDR  (high dynamic range) processing.

Image capture: I took a bracket of 3 frames with an exposure increment of 1 stop.

6576StonOrigPub1

This is the middle exposure of the three taken, before any processing. I include it so that you have something to compare to the final processed image at the top of this post.

Raw image processing: The three exposure bracketed images were processed first in Adobe Camera Raw converter to add contrast, “clarity”, noise reduction and a little (preprocessing) sharpness. They were thensaved as tiff files. (Ferrel McCollough, HDR guru, recommends this convertion of RAW to tiff format prior to loading into Photomatix)

Using Photomatix Pro 4.2.6 HDR software, it was processed via tone mapping, Exposure Fusion/Natural mode. This gives a more realistic appearance than the more powerful Detail Enhancer mode.

Then in Photoshop Elements, various areas were lightened (dodged) and darkened (burned) to draw the eye to specific areas. Nik Color Efex Pro4 “Detail Extractor” was used to enhance the small details; but, via masking, this effect was not added to the sand or sky.

Finally, Nik Sharpener Pro was used to create the final image, which is at the top of this post.

I welcome suggestions and comments.

J. Michael Harroun©2013

HDR and Panorama Combination with Moving Waves

hd4488Fs2-9-Ed3Dn1TxSp

Today is a new day. You will get out of it just what you put into it. If you have made mistakes, there is always another chance for you. And supposing you have tried and failed again and again, you may have a fresh start any moment you choose, for this thing we call ‘failure’ is not the falling down, but the staying down. -Mary Pickford

Today’s recommended site is of time lapse flower photography set to music. http://player.vimeo.com/video/27920977?title=0&%3bbyline=0&%3bportrait=0href=

For a long time I have wondered whether it was practical to do an HDR (high dynamic range) composite of an ocean/beach panorama which has (moving) waves. The primary challenge would be whether the software could deal effectively with the movement of the waves as they would not align automatically from one frame to the next (producing “ghosting”). This week I actually got around to trying it. I used images of the above sunset with a couple sitting on the beach. Exposing properly for the sky caused the sand and couple in chairs to be way underexposed. Alternatively, exposing for the couple overexposed the sky. This is a perfect situation for HDR; subtle HDR, not the exaggerated, cartoonish variety. I used Photomatix Pro 4.2.6 for the HDR processing. This is the version referred to when “Photomatix” is mentioned below.

Capture technique:

  • Shot in manual mode, auto bracketing 3 exposures each with a one stop increment and using continuous shooting drive mode. (Typically two stop increments are used, but the lighting here was not extreme.)
  • I shot just as I do any panorama (tripod and shutter release cable) except each frame of the panorama got the rapid auto bracketing.

Processing workflow:

  • Files were first processed in Adobe Camera Raw to uniformly remove noise (both luminance and color), add “clarity” and slightly (preprocessing) sharpen. Because Photomatix Pro 4.2.6 does not recognize edits made to raw files, these changes were saved in tiff file format. This conversion to tiff format is necessary because Photomatix Pro 4 does not recognize any edits/enhancements that are kept in the raw format. (A better method is to utilize Photomatix Pro 4’s ability to accept unedited raw format images as noted below under “What I will do differently next time”.)
  • In Photoshop Elements, a separate panorama was created for each of the three exposures (still in tiff file format).
  • In Photomatix, “Exposure Fusion/Natural” mode was used for the HDR processing (This results in a more natural/realistic image than given by the “tone mapping Details Enhancer” mode.) As expected, the waves went soft due to “ghosting” caused by the wave movement. But I found these results to be acceptable in this case, since the waves are incidental to the image. (If sharp waves are needed, Photomatix allows the waves from any single image to replace the HDR processed waves in order to prevent ghosting).
  • In Photoshop Elements, contrast was increased with “Color Curves”. This effect was masked out from the sand, particularly the bright middle portion of the beach as it became distracting. (Alternatively, I could have used Photomatix “finishing touches” function to increase the contrast and color.)
  • The expected wave misalignment between the side-by-side panorama frames (as previously stitched by Photoshop Elements) was easily remedied by horizontal strokes of the (Photoshop Elements) smudge tool.
  • Using Nik Sharpener Pro 4.2.6, moderate sharpening was done for “display” output (this sharpening was masked out over the sand as it looked rough and distracting).

What I will do differently next time:

  • Skip the initial processing with Adobe Raw Converter and put the raw files directly into Photomatix.
  • Since I used Photomatix “exposure fusion/natural mode, no initial noise removal was needed. This mode inherently reduces noise.
  • (However, when planning to use Photomatix “tone mapping detail enhancer” mode for HDR processing, initial noise reduction is necessary as this mode otherwise creates noise.) Conveniently, Photomatix has an automated noise detection/removal function that does a better job than my eye ball method with Adobe raw converter. To utilize this automated noise reduction, raw files are entered directly into Photomatix without any prior raw converter or Photoshop edits. This is a better workflow because it prevents the need to change the files to tiff format prior to using Photomatix. (When using this method, each side-to-side panorama frame is processed into an HDR tiff image. Then these are stitched into a panorama in Photoshop Elements.
  • I’ll use Photomatix’ selection replacement tool to replace the bright middle portion of the beach with the darker portion of the beach that was in my “middle exposure” image.

Suggestions for sharp waves:

  • Shoot with a tripod and either shutter release cable or remote shutter release
  • Use a shutter speed 1/15 sec or faster (the faster the better). If necessary to achieve adequet shutter speed, increase ISO 1-2 notches above the lowest that your camera offers (particularly if you have processing software with noise removal capability).
  • Use auto exposure bracketing with continuous shooting drive mode
  • In your HDR processing program use the de-ghosting tool to replace the entire water/wave area with that same section of one of the original images. (The waves will not show the effects of HDR processing, but will be sharper than if HDR processed.)

I welcome comments and suggestions.

My personal website is NaturePhotoRehab.com. Here, I help people to transform their average nature images into photographic art that they are proud to give as gifts or to hang on their own wall for inspiration.

J. Michael Harroun©2013

Easy Panoramas with Photoshop Elements

6169-3DSzEf3-3TxSp

The “ordinary” is the amazing, the fascinating and the liberating with which we have become so familiar as to have ceased to see it for what it actually is.

Today’s recommended site for exceptional photography: Randy Halverson’s astounding time lapse photography in video with music: Temporal Distortion http://dakotalapse.com/2012/02/temporal-distortion-2/

The photo above is of a winter storm coming onshore near San Diego, California. I expected the clouds to obscure the sunset. However, changing weather has a potential to produce dramatic sunsets. I was rewarded with this one.

This scene, with its complex light and color changes, was perfect for a panorama composite. Panoramas are not difficult with today’s (or even five year old) software. This tutorial is for photographers just beginning with panorama composites. I am using Photoshop Elements. This information applies to any version of Photoshop Elements from 7 up to the current version ,which is 11. (For those who have a limited budget, but want versatile processing software, I recommend Photoshop Elements versions 8 or 9. (Ebay and nextag often have low prices.)

Technique to create a panorama

  • Use a tripod.
  • Shutter remote control or release cable.
  • Use the same settings and focus for each frame by shooting in manual mode and with manual focus.
  • It’s important that your manual settings be based on the brightest portion of your panorama and usually with a +1/3 to + 2/3 exposure compensation. (If you are not familiar with “Manual” shooting mode, here is a good work around. In Aperture Priority shooting mode with auto focus active, set aperture to f/16 and ISO to the lowest number that your camera offers. Shoot an image of what will be the brightest portion of your panorama. In playback mode, if you like the exposure and focus, note the  shutter speed that your camera chose. Now, without touching the focusing ring of the lens, change to “manual” shooting mode . Enter the shutter speed that your camera just used. Also enter f/16 and the ISO you used for the Aperture Priority shot. Change to manual focus, again without touching the focusing ring of the lens. The previous auto focus setting will still be active. This just locks it in.)
  • Position the camera level (easiest if you have a level that attaches to the flash attachment hot shoe).
  • Adjust tripod/tripod head so that side to side rotation during the panorama series will be level.
  • Shoot from side to side in sequence with 1/3 overlap between frames.
  • I recommend beginning with 3 frames and building to more when successful with this.
  • Practice this with scenes that are not important. During a sunset the light changes rapidly. It is easy to forget a crucial aspect of the technique.

Photoshop Elements panorama processing (many other software programs also give great results)

  • Open all the images that you wish to combine in “full edit mode”.
  • Click on “File” (at the top left of the window). Then (in the drop down menu) click “New” ;then “Photomerge Panrama”.
  • In the Photomerge dialog window leave “Layout” on “Auto” (the default).
  • At the bottom of the dialog box, choose “Blend Images Together” (if not already done by default) and check “Geometric Distortion Correction”.
  • Click “Add Open Files”, then “Ok”.(If you have some open files that are not panorama parts, remove them from this list)
  • Photomerge will then work its magic. (This may take a few minutes)
  • The panorama created will have uneven edges. Crop to make it rectangular.
  • If the panorama composite looks weird, go through the same actions as above, except when you get to the Photomerge dialog page, under “Layout”, click on“Perspective”.
  • The panorama image is now on separate layers (which will make a huge file size). To fix this, go to “Layers” at the very top of the editor window. In the drop down menu click “Flatten Image” (at the very bottom of the drop down list).
  • Click “File” (at the extreme top left of the window)  and “Save As”.

That’s all there is to it.I hope this post leads someone into the fascinating world of panorama composites which has provided me with lots of fun and satisfaction.

I welcome comments and suggestions.

My website for image enhancements is NaturePhotoRehab.com where I help people to transform their ordinary nature images into impressive art to give as a gift or to hang on their own wall for inspiration.

J. Michael Harroun©2013

Pier Panorama at Sunset

P6423-6mnE2Ray3E1Pub

It is not the critic who counts, not the person who points out how the strong man stumbled, or where the doer of deeds could have done better. The credit belongs to the individual who is actually in the arena, whose face is marred by dust and sweat and blood, who strives valiantly, who errs and comes short again and again, who knows the great enthusiasms, the great devotions, and spends himself in a worthy cause, who at best knows achievement and who, at the worst, if he/she fails, at least he/she fails while daring greatly so that his place shall never be with those cold and timid souls who know neither victory nor defeat. Paraphrased from Theodore Roosevelt

Warning about Facebook: When a person posts a photo on Facebook, they are giving up all rights regarding Facebook’s use of your photos for their own advancement. In the fine print of the agreement with Facebook is that any photos uploaded to your Facebook page can be used by them for any reason without notifying you or giving you any attribution or reimbursement. They can do this as long as your photo is present on any Facebook page, even if you have ended your own account with them. Because of this, I know of many pros who have taken all their photos off of Facebook.  Here is the specific text from the Facebook agreement that all users are required to accept : “For content that is covered by intellectual property rights, like photos and videos (IP content), you specifically give us the following permission, subject to your privacy and application settings: you grant us a non-exclusive, transferable, sub-licensable, royalty-free, worldwide license to use any IP content that you post on or in connection with Facebook (IP License). This IP License ends when you delete your IP content or your account unless your content has been shared with others, and they have not deleted it.”

The story behind the above photo: Last week I went to a (we hoped) sunset photo shoot with a group of photographers. We went to Scripps Pier on the beach in La Jolla Shores, California. The weather was lovely. The people were friendly and helpful. They provided me with useful photographic advice (At the very last light of day, the digital sensors will record great colors that the eye does not see if you use long exposures created by using an f/22 aperture and the lowest ISO setting that your camera allows.)  They also explained some of the local history and geology. It was very interesting. However, as soon as I began to look for potential photographic images, I felt flat, disconnected as though I was an observer rather than a participant. The sunset started out blandly. Then, about 15 minutes after sunset, the clouds became pink and the gold sky over the end of the pier shown with a large fan of upward rays. It reminded me of a crown. Needless to say, this activated (and connected) me. I had energy and was (again) connected to nature around me and to its glory and unpredictability. There was a feeling of reverence.

The above photo of the pier is the result, a panorama comprised of 4 horizontal images (Photoshop Elements versions 9 and newer make panoramas easy). Although “every professional photographer” has images of piers, I previously did not. I had found piers lifeless (although I like a lot of other photographer’s images of piers). However, in this case, it was the combination of “just another pier” and a nice (but not spectacular) sunset that came to life and was invigorating. Once again, nature surprised me, both with its unexpected beauty and with the surge of energy that it gives me. This reinforces the advice of all of the great nature photographers: put yourself, frequently, in a good location and be ready to shoot. Then make yourself AWARE. (It is not always going to give good results, but it is the starting point upon which impressive nature photography is based. Many of the best nature images are the result of the photographer returning to the same place five of six times. I was just lucky to get this on my first visit. One again showing that “luck is often the result of preparation meeting opportunity”.)

My photo enhancement web site is NaturePhotoRehab.com. Here, I help to transform people’s average nature photos into impressive works of art that they give as gifts or hang on their own wall for inspiration.

J. Michael Harroun©2013 NaturePhotoRehab

Christmas Sunset Surprise

P6098-2prsEf1TxSp

Grace means more than gifts. In grace something is transcended, once and for all overcome. Grace happens in spite of something; it happens in spite of separateness and alienation. Grace means that life is once again united with life, self is reconciled with self. Grace means accepting the abandoned one. Grace transforms fate into a meaningful vocation. It transforms guilt to trust and courage. The word grace has something triumphant in it.  – Yrjo Kallinen

(This is my first post using my new writing style. I call it “grammar and punctuation don’t matter”. It is part of my plan to post more frequently by spending less time on each individual post. As I write this, it does not sound like a good idea to sacrifice quality for volume. However, not to be inconvenienced by logic, I am going to try it.)

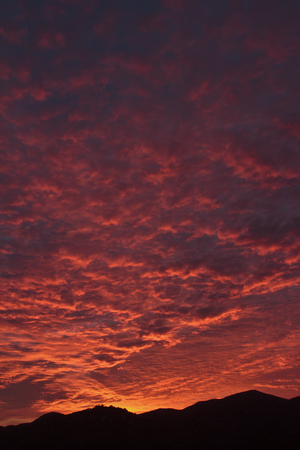
On Christmas day, the sky was heavily overcast. There had been rain the night before.  I expected that there would be no visible sunset. However I also knew that some of the most spectacular sunsets occur as the sky is clearing after bad weather. An hour before sunset, the sky was clearing a little on the other side of the mountain range, about 10 miles away toward the west. Not expecting to find anything worth photographing, I went to a spot with a panoramic view of the sky and mountain range. The sun then set uneventfully (no color), hidden behind clouds.  However, five minutes after the actual setting of the sun, the overcast condition quickly broke up, and the sky became bright gold in front of me plus overhead, to the sides and behind me. Then the sky turned pink briefly and faded away. Wow! I could not capture the entire amount of sky involved. To include as much sky as possible, I took several series of images for panoramic composites.

My willingness to take the camera to what I expected to be a “no show” sunset, led to experiencing one of the top ten sunsets of my life. This caused me to think about other aspects of successful sunset photography.

  • Go often: The majority of sunsets will not be impressive.  However, if you are not there, you cannot get images of the great sunsets when they do occur. (I am still unable to predict whether a sunset will be exceptional).
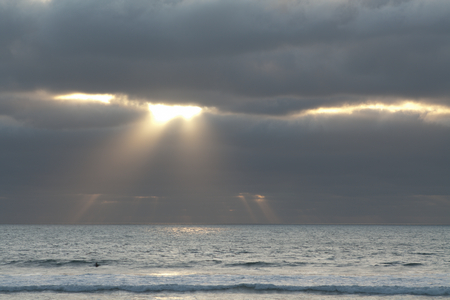
  • Arrive early: Sun rays coming through clouds (traditionally called “God rays” by photographers) can be most prominent up to an hour before the sun actually sets. Plus, arriving early will allow you to scout out good locations and foreground subjects.
  • Stay late: The best color (pink and red) often occur 20 to 25 minutes after the sun sets.
  • Bring a tripod: Exposures of the last pink or red can be several seconds in duration.
  • The most dramatic sunsets occur when the weather is changing, particularly when bad weather is moving out.
  • Unless a sunset is spectacular, include a foreground object. The easiest way to do this is with the foreground object is as a silhouette. If a silhouette is not used, correct exposure for both this object and the sky simultaneously requires either a neutral density filter or bracketed exposures used for high dynamic range (HDR) processing. (HDR processing is the technique that I personally like. It is surprisingly easy. First bracket your exposure for 3 frames in increments of 1 to 2 stops. Then process them with software such as Photomatix from http://www.hdrsoft.com which offers a free trial of their software. This is a good starting point for shooting HDR, although this technique, to be mastered, is very complex.)

Image processing:

  • I processed the original RAW  format images in Photoshop Elements raw converter.
  • Brightness, vibrance and clarity were added.
  • Noise, both luminance and color, were reduced.
  • A tiny bit of sharpening was added.

Here is the result on a single frame.

6100Downsz1

Although improved via raw converter processing, the images (like the single frame above), the color is a little dull and the lighting a little flat. Therefore, after generating a panorama using Photoshop Elements panorama tool, I used Nik ColorEfx Pro4 (once again, to the rescue). I used a little Pro Constrast and a little Color Range Contrast with good results.

Finally, I sharpened via Nik Sharpener Pro 3.0 (which I love). The final composite is the image at the top of this post. It is made from 7 images taken from side to side with the camera in a vertical orientation and a one third overlap between frames.

I welcome comments, criticism and suggestions for future blog topics.


I am available at my photo enhancement website (NaturePhotoRehab.com) to assist clients with transforming their common nature photos into uncommon works of art that they are proud to give as gifts or to hang on their own wall for inspiration.

J. Michael Harroun ©2013  NaturePhotoRehab.com